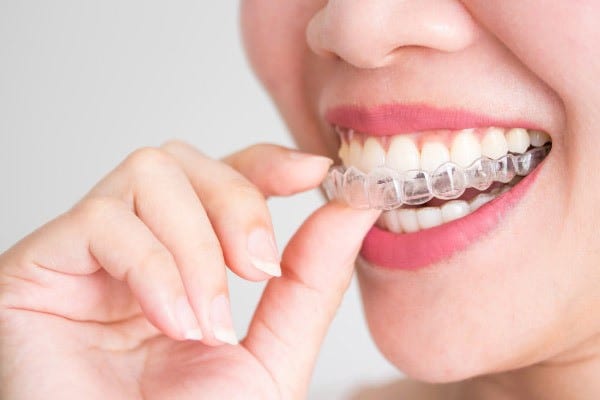
Dental Cleanings: Step-By-Step
Some of us who attend regular dental cleanings do not know much about the dental cleaning process. We may have a concept of the different steps, as well as our favorite and least favorite parts throughout, but we are not aware of what each step is doing for our teeth.
On the other hand, some of us avoid regular dental cleanings altogether. Why? Generally, a lack of understanding is the primary factor that fuels fear. Thus, patients who do not understand the dental cleaning process tend to avoid attending their regular dental appointments.
Whether you are the patient described in the first paragraph, or the second, we believe it is important for you to be fully equipped with the knowledge you need to make the wisest decision possible in regards to your dental health.
We have decided to take you through the dental cleaning process, step-by-step, to educate you on what each step of the process does for your teeth. Remember, attending regular dental visits plays a pivotal role in the maintenance and continuation of your dental health, and thus, your general health.
Examination
Teeth cleanings are generally performed by a dental hygienist. Before the cleaning process begins, the dental hygienist provides the patient with a full oral examination. The oral examination step of a cleaning is much like the physical exam you receive from your physician! The purpose of any examination is to check for any signs of health risk or issues that can be detected by a visual scan and/or series of testing techniques.
During the oral examination step of a dental cleaning, the dental hygienist uses a small mirror to check your teeth and gums for any signs of gum inflammation (gingivitis) or an indication of a serious oral health issue. This step is extremely important because many general health issues are detected through an evaluation the tongue and mouth.
Removal of Plaque and Tartar (Scaling)
The next step of the dental cleaning process is the removal of plaque and tartar. With the guidance of the same small mirror used in the examination step, the dental hygienist utilizes a tool called a scaler to remove plaque and tartar around your gum line.
The scraping that patients hear during this step often raises their anxiety, but we can assure you that this scraping is completely normal and extremely beneficial to your dental health. Removing the plaque and tartar from in between your teeth, as well as around your gum line, keeps your teeth healthy and reduces your risk of developing gum disease (periodontitis).
Polish Cleaning With Toothpaste
After your dental hygienist has thoroughly removes the plaque and tartar, he or she then brushes your teeth with a gritty toothpaste and a high-powered electric toothbrush. The sound you will hear at this point is the sound of a strong electric toothbrush at work. Rest assured that this step is simply a very thorough teeth brushing session, and you don’t even have to lift a finger!
Why is the toothpaste a gritty consistency for this step in the dental cleaning process? The grit in the toothpaste is meant to scrub and polish your teeth directly following the removal of plaque and tartar. This is when the surface of each tooth is the cleanest and thus, the most susceptible to an effective clean.
Flossing, Rinsing
Regardless of whether or not you floss at home, the flossing session you receive during a dental cleaning is more productive than you can ever floss on your own. How? The dental hygienist flosses between each and every tooth, getting into those hard-to-reach places for a thorough removal of any remaining food particles and/or plaque.
In addition, dental hygienists can locate spots that may need more flossing attention and ensure that the patient is aware of which teeth need to be focused on. The sections of your gums that bleed more than others when being flossed require more attention as this may be an indication of early gingivitis.
Now, your dental hygienist will have you rinse your mouth thoroughly and spit into the mini-sink that is attached to the dental chair. You will be encouraged to rinse to your comfort, getting rid of everything that was removed from your teeth throughout the entire cleaning process.
Fluoride Treatment
Lastly, you will receive your fluoride treatment! When it comes to the dental cleaning process, fluoride treatment is the cherry on top. This seals the deal, serving as a protectant for your teeth to help fight against cavities until your next cleaning.
When you think of the step with a foam filled mouth piece, this is the fluoride treatment. If this is the step you are leery of, just remember it’s importance. The fluoride treatment places a coating over your freshly, thoroughly cleaned teeth to protect them for the coming months of food and plaque buildup. Sit tight for one minute and you will be sent on your way with a refreshed, squeaky clean smile.
All Done! Now What?
To put things into perspective, here’s a metaphor:
Think about cleaning off a cluttered, dirty desk. You first have to assess the situation, remove the clutter, dust the surface, and then deep clean with a cleaning product for a seal of cleanliness. Your job from there, forward, is to maintain the cleanliness of your desk by regularly clearing the clutter, dusting, and windexing.
The dental cleaning process goes in that exact order. Examine the mouth. Remove the plaque and tartar. Brush and polish the teeth. Seal the clean with a fluoride treatment. Schedule your next appointment, and in the meantime, keep up with your oral hygiene by brushing and flossing twice a day.
Ideally, your next appointment should be scheduled for 6 months from now. Let us help you to maintain a healthy mouth and a healthy lifestyle!